- 65shares
- 58
Dipping Chocolate
Fancy chocolates are a always a hit for any occasion. Chocolate fountains are sure to entertain and impress, but since they take up a lot of storage space for very limited use we’re going to talk about making and using much smaller quantities of dipping chocolate. Chocolate dipped strawberries, among the top on my list, are very expensive to purchase but so economical (as long as strawberries are in season) and easy to make at home.
Chocolate candies, either tailored to individual tastes or to individual shapes and sizes are equally easy to make in almost no time at all. Decorating with dipping chocolate is also fun to do and an easy way to express your feelings. At our house, anything dipped in chocolate is an immediate hit and I have never had to worry about storing my chocolate, unless it is to hide it for a special occasion! But, dipping chocolates are not just for dipping.
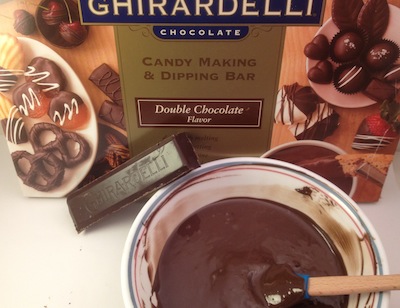
Melt Dipping Chocolate
The days of standing over a double boiler and melting chocolate with oil or cream are fading, thanks to new chocolate products that are made especially for melting and dipping. I found this huge 2.5 pound Ghirardelli dipping chocolate bar at the Ghirardelli outlet for $5. The clerk told me that they just arrived at the store so, of course I had to try out a new bargain. I was very glad I did, I’ve used it a few times already and still have more left. It melts quickly and tastes smooth and creamy without any waxy taste. There are lots of brands of dipping chocolates now available.
How To Melt Chocolate For Dipping:
Process small batches at a time when melting chocolate for dipping, it will not only melt quicker but also be easier to handle. A cup or chocolate goes a long way in decorating, so don’t fill your bowl more than halfway with dipping chocolate when preparing to melt. There’s really just one step to melting dipping chocolate, but since melted chocolate does again harden rather quickly there is a little preparation involved and some cautions of which you should be aware.
1) Preparing to melt chocolate:
You need to work quickly once the chocolate has melted. So, before you begin make sure to have everything you need ready:
A) Have wax paper (cut-rite) laid on top of a baking pan and ready to support your finished product. Melted chocolate will not stick to wax paper and having a tray underneath will allow for transport afterwards.
B) Have a small rubber scraper ready, it’s the best tool to help in the whole process once the dipping chocolate has been melted.
C) If you are mixing in ingredients to make candy, make sure the ad ins are all on the counter ready to go. If you are using strawberries, make sure they have been washed and dried and are sitting on some waxed paper ready to go. If you’re using nuts, have them roasted for extra flavor. If you are writing with your melted chocolate, have the tip already secured in a plastic bag (see more information below).
2) Actually Melting Dipping Chocolate:
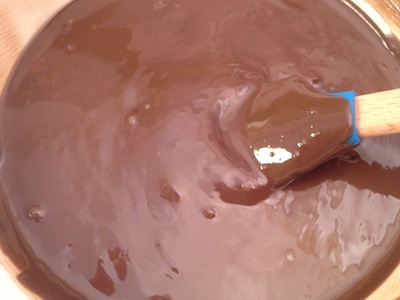
Just pop a bowl of the chocolate sections or pieces into the microwave for about 30-40 seconds, give it a good stir and then give them another 10-20 seconds of microwave time and stir them again. A small bowl should be done with those two amounts of time but since microwaves and amounts vary please read on. Continue with successive small amounts of time if they are not all melted yet. But stir well between each cooking time, you will find that if there are a few small lumps of chocolate left they will disappear when stirring and your chocolate has been successfully melted. Microwaves do vary in temperature, so you may need to experiment with yours and even use a lower temperature if your oven allows.
Note: If your chocolate hardens before you are done, it can be re-heated to soften. Just give it another short time in the microwave, maybe 20 seconds and then stir.
3) Cautions when melting chocolate:
While Melting Chocolate be very careful to give them a shorter amount of time with each successive turn because chocolate burns very easily and very badly. If it starts to burn you will see a darker area that looks a bit like bubbles that froze halfway through popping and it will smell bad. You will want to toss that melted chocolate and begin again.
Write with Dipping Chocolate
Ideas Of What To Do With Dipping Chocolate:
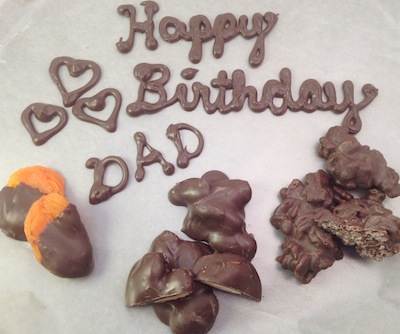
Being a firm believer that most anything is better if dipped in chocolate, the possibilities are endless. The process of melting dipping chocolate remains the same, so go ahead and melt chocolate and dip whatever you like. Wilton has many different molds that can be used to make chocolates in different shapes and you can buy colored chocolate pieces from them too to make professional looking chocolates for all sorts of occasions. You can of course dip fresh or dried fruits, pretzels, cookies, candies, cakes, crackers, whatever.
Writing With Dipping Chocolate

I like to write with chocolate and leave special messages for people. They can then eat the evidence so the note is never traceable (ha)!
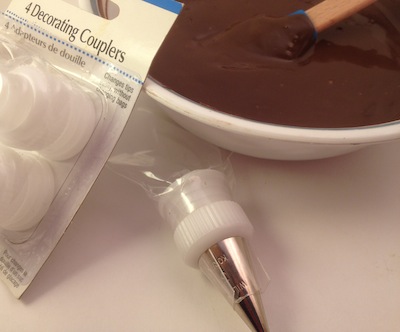
To do this, it is best to have a plastic pastry bag (or just a baggie works fine) since the bag is hard to clean and easiest to just throw away. If you use a baggie, but make sure it is a good quality one since the chocolate is warm and you do need to squeeze hard (the brand names that I tried all worked fine). I use a fine circular tip within a coupler in order to get uniform writing.

Cut the tip off from one corner of the baggie and insert the metal tip and inside piece of the coupler. Then screw the sealing piece of the coupler over the outside of the baggie. Fill the baggie with melted chocolate, over a piece of wax paper since the chocolate will start dripping out the tip (plug the tip first with a piece of saran wrap). Seal the baggie and begin writing or drawing while squeezing one hand firmly around the baggie just above the chocolate and the other guiding your writing.
When finished writing, place the tray into the refrigerator for about 10-15 minutes for quick hardening. Again, writing onto wax paper placed over a tray works best and after refrigeration even whole words will lift right off the wax paper.
Make a lot of letters of the alphabet on mini-cupcakes and challenge your kids that if they take one, they must leave a message behind by re-arranging the cupcakes into different full words. It is interesting to see what other words pop up when a letter is removed. Chocolate writing also works well on pies, like pecan or fruit pies that are otherwise sometimes hard to decorate. Melted dipping chocolate also works well on whipped cream topped desserts for that extra expression. Be creative, a little dip can go a long way!
Storage of Dipping Chocolates
After Making Dipping Chocolates:
Storage of Chocolate Dipped Fruits, Cookies or Candy: If you can’t wait to consume your dipped chocolate fruit or dipped chocolate cookies or homemade candy and want them to harden right away then you will want to put the tray into the refrigerator. If a tray of melted dipping chocolate is placed in the refrigerator it will harden in about 30 minutes. If left on the counter to harden, it will take at least an hour of course depending on the temperature of your kitchen. Once hardened, they can be stored in an airtight container on the counter. For fresh fruits, you will want to store them in the refrigerator if they are not consumed the same day. Fresh fruit will begin to leak liquid so their shelf life does decline rather quickly.
Clean-up after dipping chocolates: Although melted chocolate does not cling to wax paper or cut-rite, it clings like crazy to plates and utensils. So, be sure to wash your plates or bowls immediately after using and before the chocolate dries. Otherwise, you need extremely hot water to again melt that chocolate and release it off your plate. P.S. Licking also works!
For 12 more yummy good for you treats, check our healthy sweets.

